
Last updated November 17, 2026
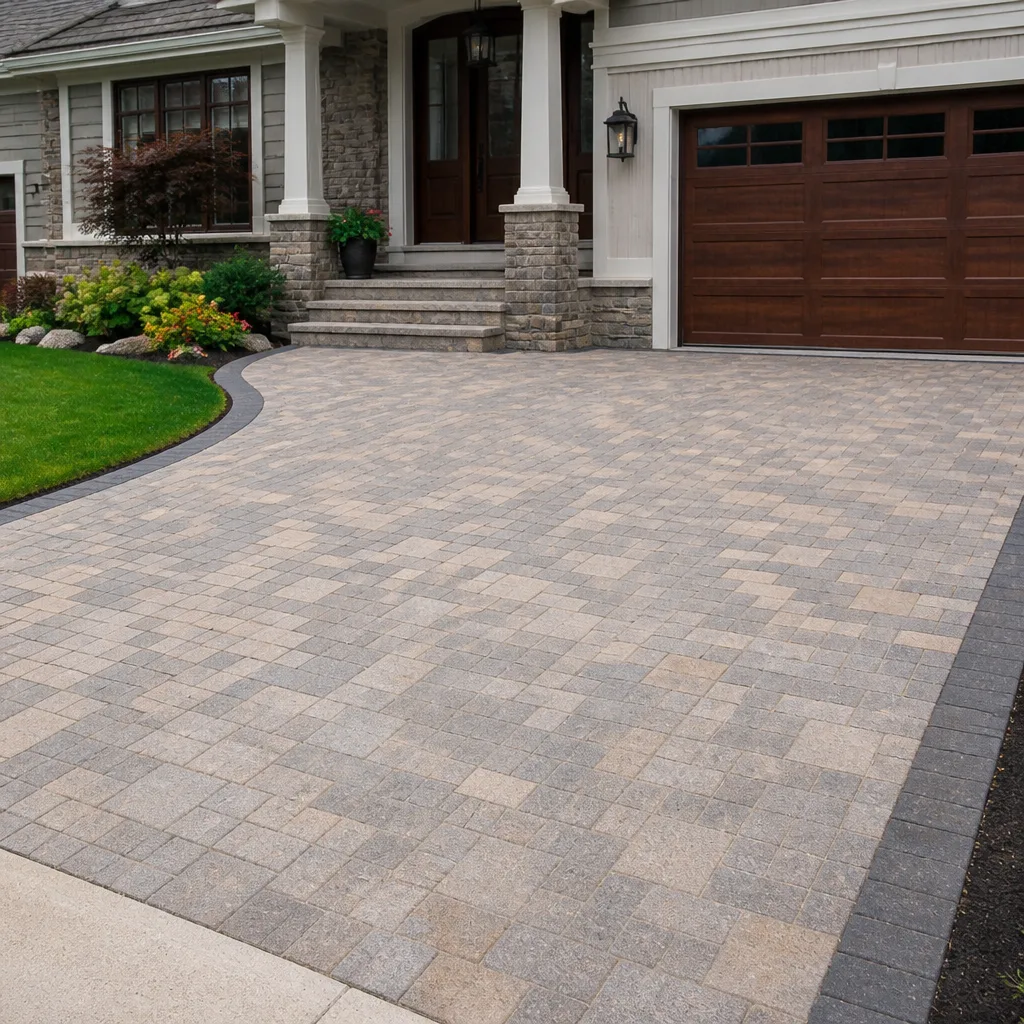 Driveway & pavers
 Kitchen remodeling
 Bathroom remodeling
 Home additions & ADU
 Roofing
 Windows & doors
 Fence
Free written scope consultation - allowances, timeline, and change-order rules on paper before a single trade is scheduled
Driveway & Pavers Troubleshooting in Burbank: Common Problems and How to Fix Them
A single sunken paver section that gets re-leveled without fixing the drainage problem underneath it will sink again within two rainy seasons. That’s the uncomfortable truth about paver repair, and it’s the reason so many Burbank homeowners end up paying twice for the same stretch of driveway. The visible damage – the dip, the loose sand, the white film, the chipped corner – is almost never the actual problem. It’s the symptom of base failure, root intrusion, or a bad edge restraint that nobody diagnosed. This guide walks you through how to read those symptoms, tell one root cause from another, and decide what actually needs to happen before anyone starts lifting pavers in Burbank.
Quick Answer
Most driveway paver problems in Burbank trace back to one of three root causes: a sub-base that wasn’t compacted or drained correctly, tree roots lifting sections from below, or edge restraint that has failed and let the field spread. Surface fixes like re-sanding or re-leveling a single paver work only when the base is sound. If the same section has sunk twice, or if pavers are shifting toward the street, the fix is structural, not cosmetic.
Styles & brands we work with
- Kitchen remodeling
- Bathroom remodeling
- Home additions & ADU
- Roofing
- Windows & doors
- Driveway & pavers
- Fence
Table of Contents
- How Do You Diagnose What’s Actually Wrong With Your Pavers?
- Sinking and Settlement: Base Failure vs. Tree Roots vs. Edge Restraint
- Why Heavy Rain Washes Out Polymeric Sand and How to Reapply It
- Efflorescence vs. Oil Staining: Getting the Treatment Right
- When a Cracked Paver Is Cosmetic and When It Signals Sub-Base Movement
- Sourcing Matching Pavers for Discontinued Colorways
- Should You Seal a Paver Driveway in Burbank?
- A Simple Seasonal Maintenance Routine That Prevents Big Repairs
How Do You Diagnose What’s Actually Wrong With Your Pavers?
Before you call anyone or buy a bag of sand, spend twenty minutes walking the driveway and reading it. Pavers fail in patterns, and the pattern tells you where the problem lives. A dip in the middle of an open field with no tree nearby is a base problem. A wave running in a line from a nearby tree is a root problem. A whole edge that has crept outward, leaving a widening joint at the border, is an edge restraint problem. Each one has a different repair and a very different cost.
Run through this checklist in order:
- Walk the whole surface barefoot or in thin soles. Your feet catch shallow depressions that your eyes miss. Note every low spot and whether it’s isolated or connected to others.
- Look at the perimeter first. Check where the pavers meet the curb, the garage apron, and any adjacent concrete. Gaps, cracks in the edge restraint, or pavers sitting proud of the border all point to lateral movement.
- Trace lines back to trees. A line of lifted pavers that runs toward a mature tree or shrub is almost always root intrusion, even if the tree is several feet away.
- Check the joints. Wide, empty joints mean the sand has washed out. Joints that are full but the pavers still rock mean the bedding layer below has failed.
- Note where water stands. After a rain, walk the driveway and mark every puddle that lasts more than a few hours. Those spots show you where the base is holding water instead of draining it.
- Photograph everything. A dated photo set over a few weeks tells you whether movement is ongoing or has stabilized, which changes the recommended fix.
That last step matters more than people expect. A paver that shifted once during a heavy rain event and hasn’t moved since is a different problem from one that’s creeping a little more every month. For a deeper look at how a driveway is supposed to be built so it doesn’t move in the first place, see our guide to driveway & pavers.
Sinking and Settlement: Base Failure vs. Tree Roots vs. Edge Restraint
Settlement is the single most common complaint we hear, and it’s also the one most often misdiagnosed. The fix depends entirely on which of three causes is at work, and the costs differ significantly.
Base Failure
If the aggregate base under the pavers wasn’t excavated deep enough, wasn’t compacted in proper lifts, or didn’t have a drainage path, the whole assembly compresses over time. You’ll see broad, shallow dishing across an open area, often in the middle of the driveway where traffic loads concentrate. Water sitting in the joints accelerates it because saturated base loses strength. The repair involves lifting the affected field, removing and replacing the failed base, re-compacting, and resetting the pavers on a fresh bedding layer. This is the most involved of the three fixes.
Tree Root Intrusion
Roots from mature trees seek moisture and lift pavers in a distinct line. You’ll see a ridge, not a dip, running from the tree’s base into the driveway. In older Burbank neighborhoods with mature street trees and large lot plantings, this is common. The fix requires cutting the offending roots (which needs care so the tree stays healthy and stable), installing a root barrier along the driveway edge, and resetting the lifted section. If roots are severe and recurring, re-routing the driveway edge or replacing that stretch with a flexible surface is sometimes the wiser long-term choice.
Failed Edge Restraint
The pavers at the driveway border are held by a restraint – typically a concrete curb, aluminum or plastic edge, or a soldier course set in concrete. When that restraint breaks, the whole field can spread outward toward the street. You’ll see widening joints at the border and pavers creeping. The fix is to remove and rebuild the edge restraint, then re-tighten the field from the edge. Catch this early and it’s a modest repair; ignore it and the whole field loosens and needs re-setting.
Why Heavy Rain Washes Out Polymeric Sand and How to Reapply It
Polymeric sand locks the joints and keeps pavers from shifting against each other, but it’s not permanent. When Burbank gets an occasional heavy rain event, water sheeting across a driveway can scour the joints much faster than homeowners expect, especially if the driveway has any low spots where water pools. Once the joints are washed out, pavers start to rock, and rocking pavers grind the bedding layer into dust. That’s how a sand problem becomes a base problem.
Reapplying polymeric sand without lifting pavers is a job you can do yourself if the field is stable. Here’s the sequence that gives the best result:
- Wait for a dry stretch. The pavers and joints need to be dry before you start, and the forecast needs to stay dry for the curing window on the bag.
- Clean the joints. Remove old loose sand, debris, and weeds with a stiff brush or a joint-cleaning tool. Don’t use a pressure washer at high pressure – it drives water under the pavers and can loosen the bedding.
- Check joint depth. Joints need to be roughly half their width deep for the sand to lock. Refill any joints that are too shallow or too deep before you start.
- Sweep the sand in. Pour and sweep in small sections, working the sand fully into the joints at a 45-degree angle to the joint lines.
- Compact. Run a plate compactor over the surface (with a protective pad) to settle the sand, then top off any joints that drop.
- Brush off the surface completely. Any sand left on the paver faces will haze over and set hard. Sweep it off before you activate the sand.
- Activate according to the bag. Follow the manufacturer’s activation step exactly – typically a light misting that sets the polymer. Over-wetting is the most common failure.
If those joints wash out again within a season, the water isn’t draining off the driveway the way it should, and that’s a base or grading fix, not another bag of sand.
Efflorescence vs. Oil Staining: Getting the Treatment Right
Two stains look similar from ten feet away but need completely different treatment, and using the wrong one can etch the surface permanently.
Efflorescence is a white, powdery, or chalky film that appears on mineral-based pavers. It’s salts migrating to the surface as moisture moves through the concrete. It’s cosmetic and it will usually weather off over time, but it can be stubborn. The right approach is a dedicated efflorescence remover (a mild acidic cleaner sold for this purpose), diluted per the label, tested on a hidden spot first. Never use muriatic acid at full strength on pavers – it will etch the surface and leave a permanent dull patch. Brush it in, let it dwell per the label, rinse thoroughly with clean water, and repeat if needed after a dry spell.
Oil staining is dark, greasy, and sits in the pores of the paver. The treatment is a degreaser or a poultice (an absorbent powder mixed with a solvent, spread over the stain and left to draw it out), not an acid. Acid on an oil stain does nothing and etches the surface. For fresh oil, blot immediately, cover with absorbent powder, and leave it for a day before sweeping. For set-in stains, a poultice is the safest option.
Before you apply anything, test a hidden corner. Both acids and degreasers can change the paver’s finish, and a small test patch tells you what will happen before you commit to the whole driveway. If you’re not sure which stain you’re looking at, dampen the surface – efflorescence often disappears when wet and reappears as it dries, while oil stays dark.
When a Cracked Paver Is Cosmetic and When It Signals Sub-Base Movement
A single chipped or cracked paver in an otherwise stable driveway is a cosmetic issue. Replace that one paver and move on. But a pattern of cracks – especially cracks that appear along a line, or that show up in the same area repeatedly – is a signal that something below is moving.
Here’s a quick way to tell the difference:
- Cosmetic crack: One or two pavers, no movement around them, cracks are from impact (dropped object, heavy vehicle load on a small area). The surrounding pavers are tight and level.
- Structural signal: Multiple cracked pavers in a line, joints around the cracks are wider than elsewhere, the surrounding pavers rock or show a slight lip. This points to a base problem or a point load that’s crushing the assembly.
- Movement from below: Cracks that appear and widen over time, or a paver that’s cracked and also sitting lower than its neighbors. Water reaching the base is the usual culprit.
Ignoring a structural signal is expensive. A small area of failed base that gets re-compacted and reset costs far less than waiting until the surrounding field loosens, which means a much larger section has to come up. On a driveway with proper Construction Burbank construction standards, cracks from base failure shouldn’t appear at all – if you’re seeing them, the fix is worth doing right rather than spot-patching.
Sourcing Matching Pavers for Discontinued Colorways
Here’s a problem that gets harder every year: you need two or three pavers to replace cracked ones, and the colorway was discontinued a decade ago. Burbank’s older neighborhoods have driveways installed in styles and colors that manufacturers have since rotated out. If you replace those pavers with a mismatched color, the repair is visible from the street, which defeats the purpose.
Here’s how to approach it, in order of preference:
- Identify the manufacturer and product. Look on the underside or side face of a paver for a stamp or imprint. Many brands mark their product. Take a photo and a rubbing of the surface texture and color before you search.
- Call the manufacturer directly. Some brands keep small legacy stock of discontinued lines, or can tell you which current line is the closest match. This is worth the phone call before you give up.
- Talk to a contractor with brand access. A contractor who works regularly with Belgard, Techo-Bloc, Unilock, Tremron, and Cambridge Pavers has relationships that help with sourcing odd lots, returns, and closeouts that a homeowner can’t reach directly.
- Harvest from hidden areas. If sourcing fails, pavers from an apron, a rarely seen side strip, or under a planter can sometimes be relocated to the visible area, with the visible replacement going where nobody looks.
- Turn the mismatch into a feature. If a true match isn’t possible, a deliberate border course or accent pattern in a complementary color reads as a design choice instead of a patch.
The earlier you solve the matching problem, the more options you have. Once you’re down to a single paver, your choices shrink considerably. If you’re planning new pavers or a full re-lay, our driveway and paver work covers material selection from the start, so you’re not chasing a discontinued color in ten years.
Should You Seal a Paver Driveway in Burbank?
Sealing is optional, and it’s often oversold. A quality penetrating sealer can slow staining and reduce efflorescence, but a film-forming sealer on a driveway that has any moisture issue will trap water and make the problem worse. If your pavers are stable, clean, and well-sanded, a breathable penetrating sealer is a reasonable choice for stain resistance. If the driveway has settlement, wide joints, or standing water, fix those first – sealing over them is money spent to hide a problem that will surface again.
Two things to know before you seal. First, the surface must be completely dry and clean, and the joints must be freshly sanded and cured. Second, follow the manufacturer’s application rate exactly; too much product leaves a haze and a slippery film. If you have a concrete paver surface in a color you love, sealing will slightly deepen the tone – test a hidden spot first if you’re unsure.
A Simple Seasonal Maintenance Routine That Prevents Big Repairs
Most of what we fix could have been prevented with a five-minute inspection every few months. The routine is simple and costs almost nothing.
- After any heavy rain, walk the driveway. Mark standing water and look for joints that have washed out. Catch the sand loss before it becomes base failure.
- Keep the joints full. Top off any joint that’s dropped below the paver face. A bag of matching joint sand and a stiff brush is the cheapest tool in the box.
- Clear debris from edges and drains. Leaves and soil piled against the driveway edge hold moisture there and shorten the life of the edge restraint.
- Check the perimeter once a year. Look for paver movement toward the street, cracks in the edge restraint, and any gap where the driveway meets the garage apron or curb.
- Treat stains early. A fresh oil spot is a ten-minute job; a set-in stain that’s bonded to the paver surface can be a much bigger deal.
- Note the position of any new crack or dip. If it’s still there and bigger three months later, that’s your cue to have it looked at properly.
For homeowners who want the whole exterior handled consistently, that same maintenance rhythm is worth applying to the rest of the yard. Our fence installation team sees the same pattern on fence lines – small, early fixes preventing large repairs later.
Common Mistakes to Avoid
- Re-leveling a single paver without finding the cause. If the base, a root, or the edge restraint is at fault, the paver will sink again, often within the same rainy season. Diagnose before you repair.
- Using muriatic acid at full strength on efflorescence. It can etch the paver surface permanently. Use a dedicated efflorescence remover and test in an inconspicuous spot first.
- Skipping the sand-settling step. Reapplying polymeric sand without compacting it in lifts leaves the joints loose and they wash out faster the next time it rains.
- Sealing a driveway with active settlement. Sealing traps moisture and hides the real problem. Fix the base, joints, and drainage first; seal last.
- Ignoring a widening joint at the edge. If the pavers are spreading toward the street, the edge restraint has likely failed. Small repair now, full re-lay if you wait.
- Patching with a mismatched paver and calling it done. A visual patch is fine as a temporary fix, but if it’s the visible face of the driveway, source a proper match before the surrounding pavers are reset.
- Pressure washing at high pressure near the joints. It blasts out the joint sand and can loosen the bedding layer. Use a low-pressure setting or a stiff brush for cleaning.
See the difference
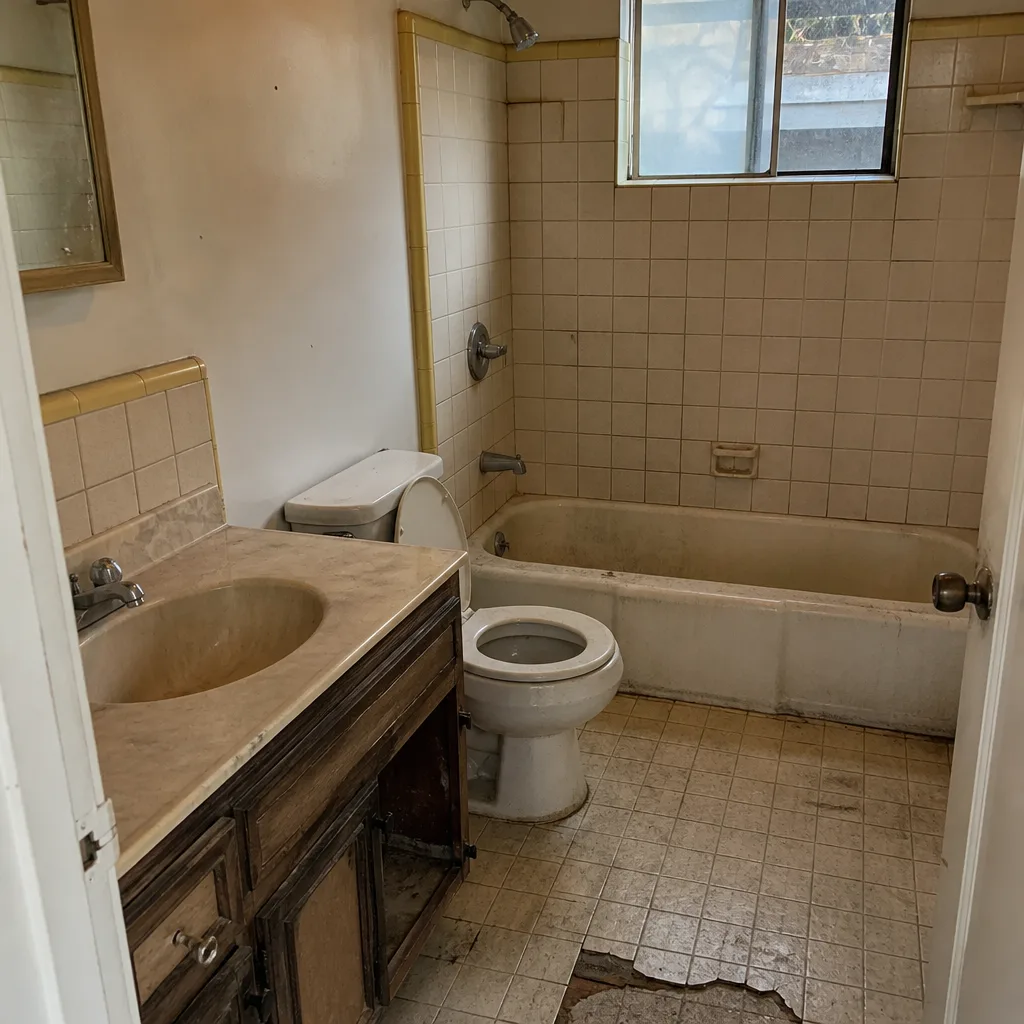 Before
 After
 Before
 After
 Before
 After
When to Call a Professional
Some paver problems are genuinely DIY-friendly – reapplying joint sand, treating a stain, replacing a single cracked paver. Others are not. Call a professional if you’re seeing any of the following: a driveway section that has sunk twice in the same spot, pavers moving or spreading toward the street, a line of lifted pavers near a tree, standing water that persists more than a day after rain, cracks appearing in a pattern, or a paver surface where a matching replacement can’t be sourced. Structural repairs need a properly compacted base and correct edge restraint, and getting those wrong is how a repair turns into a full re-lay. Construction Burbank offers free estimates in Burbank – call (833) 954-6131 to schedule a look at no cost.
Frequently Asked Questions
Repair costs vary widely depending on what’s actually wrong. Single-paver replacement and joint re-sanding are the least involved. Re-building a section of base or re-setting an edge restraint runs considerably higher. Because the diagnosis drives the price, we always recommend a written, line-item estimate before any work begins. Call (833) 954-6131 for a free estimate.
Because the base under that spot is holding water or was never compacted properly, and no amount of surface re-leveling will change that. Each re-leveling settles the paver back down, but the water and the weak base remain. The fix is to lift the affected section, correct the base and drainage, and reset. If the same spot sank twice, that’s the signal.
Not effectively. The old sand is usually loose, contaminated, or too shallow, and new sand won’t lock into that. Remove the old sand from the joints, verify the joint depth is adequate, then apply the new sand per the manufacturer’s instructions. Call (833) 954-6131 if you’d like us to handle the sand and jointing.
That’s efflorescence – salts migrating to the surface as moisture moves through the pavers. It’s cosmetic, not structural, and it can be removed with a dedicated efflorescence remover applied per the label. It doesn’t damage the pavers, but it’s a sign that moisture is moving through the assembly, which is worth understanding. Call (833) 954-6131 for a free estimate if you’re unsure.
Repair when the base is sound, the field is stable, and only a small section is affected. Replace when the base is failing across a large area, the edge restraint is gone, or the pavers can’t be matched. A written estimate with a clear diagnosis makes the decision straightforward, and we provide one at no cost.
Often yes – through the manufacturer’s legacy stock, closeout lots, or the brand relationships a contractor has access to. Belgrad, Techo-Bloc, Unilock, Tremron, and Cambridge Pavers have current lines that are often close matches. Start the search as early as possible; options narrow once you’re down to a single paver. Call (833) 954-6131 and we’ll help identify your pavers.
The Bottom Line
Paver problems are almost always a symptom, not the cause. Before you buy sand, sand down a stain, or pay someone to re-level a single paver, spend a few minutes diagnosing the actual reason it moved. Broad dips usually mean base failure, ridges pointing at a tree mean root intrusion, and spreading at the border means failed edge restraint – each needs a different fix, and each is cheaper to correct early. Whether your driveway needs a small repair or a full re-lay, an accurate written estimate is the right starting point. If you’re planning a broader property upgrade, our home additions & ADU team can tie the driveway into a larger exterior plan.
Schedule a Free Paver Estimate in Burbank
If you’ve got a driveway that keeps settling, joints that won’t hold sand, or pavers you can’t match, the fastest way to know what it needs is a proper look. Construction Burbank provides free written estimates on driveway, paver, and exterior repairs. Our technicians have up to 15 years of experience diagnosing exactly this kind of problem. Call (833) 954-6131. We answer 24/7. Fast dispatch from 7am to 7pm, Sunday through Friday.
Written by the team at Construction Burbank.